Introducing the new Gigabot Firmware 4.2.0. This new firmware release features the latest version of Marlin 1.1.8 and is packed with new features that will elevate the user’s experience with the Gigabot.
Notice: This Gigabot Firmware is only for users with the Azteeg X3 Pro (GB-371 and up) with the dual limit switch kit. This version will not work for bots with single Y limit switches.
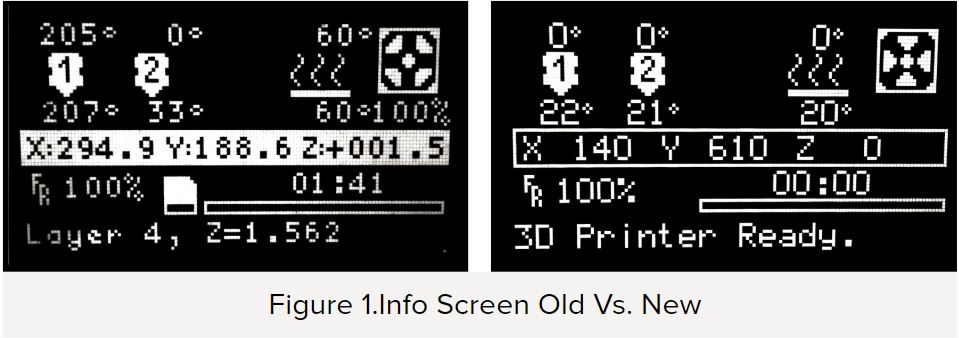
The changes in the new firmware can immediately be noticed on the main info screen of the Gigabot. The larger font makes it easier to read and navigate. (Figure 1.)
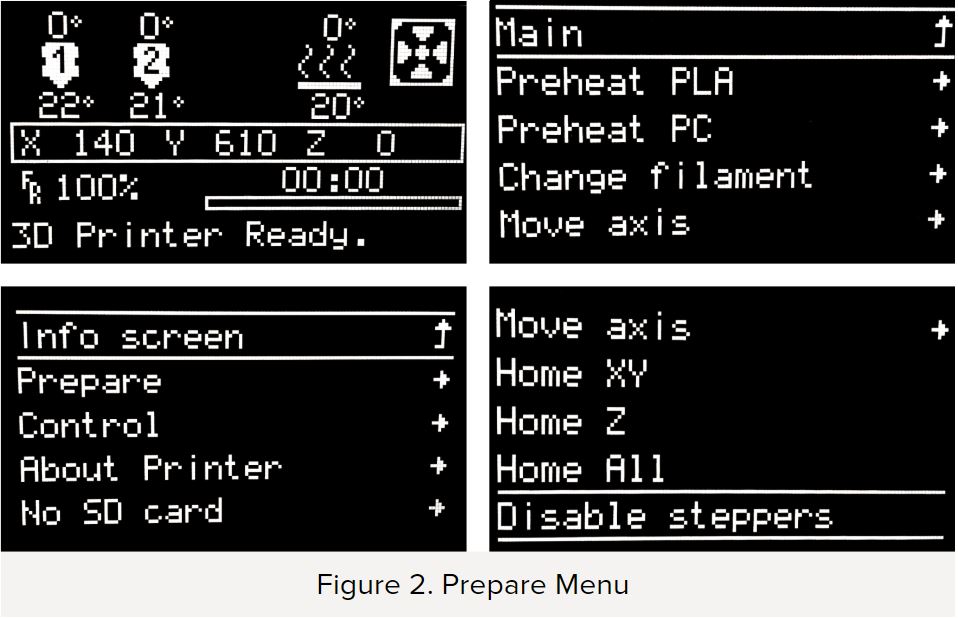
The contents and item order of the Prepare Menu have also changed to create an easier and more accessible experience. The preheat option is placed on the top so a target temperature can be set quickly. A new and improved Change Filament routine item is shown followed by the Move Axis menu plus three axis homing actions. (Figure 2.)
About Printer is the newest addition to the screen menu (Figure 3). This menu displays useful information about the printer, such as the model number, firmware upload date, prints completed/ failed, total print time and longest print job completed. This data can be used to keep track of a regular maintenance schedule for your Gigabot.
Dual Y Axis Homing Switch
A major feature of the new firmware is the support for dual Y-axis homing switches. This feature provides more consistent performance and a higher degree of dimensionally accurate printed parts out of the Gigabot.
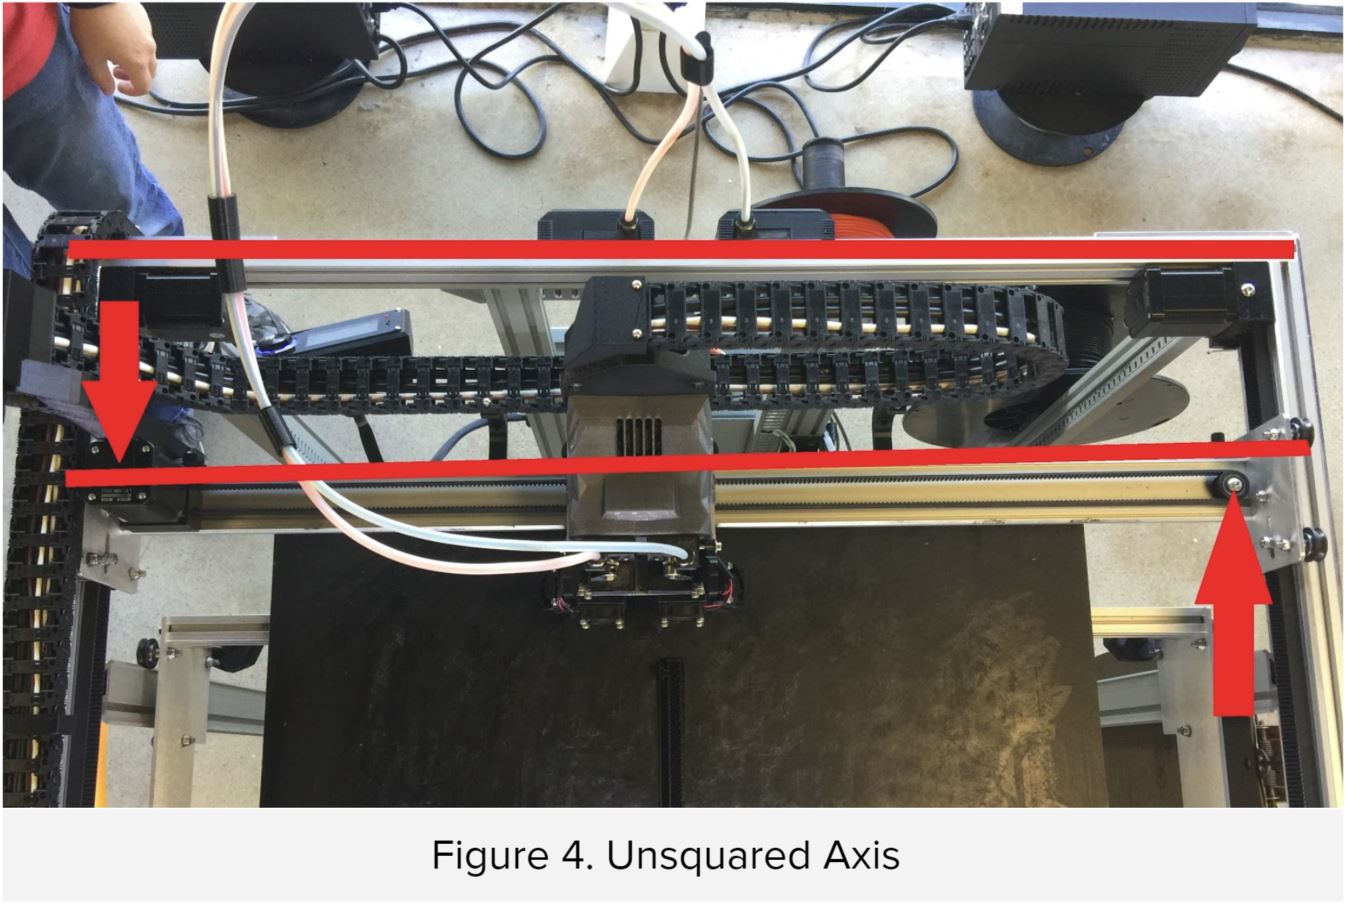
Previously, a single homing switch existed on the left Y motor, resulting in a carriage that was not consistently parallel to the machine frame. During a filament change, it was possible for an accidental displacement of the carriage, losing positional accuracy (Figure 4).
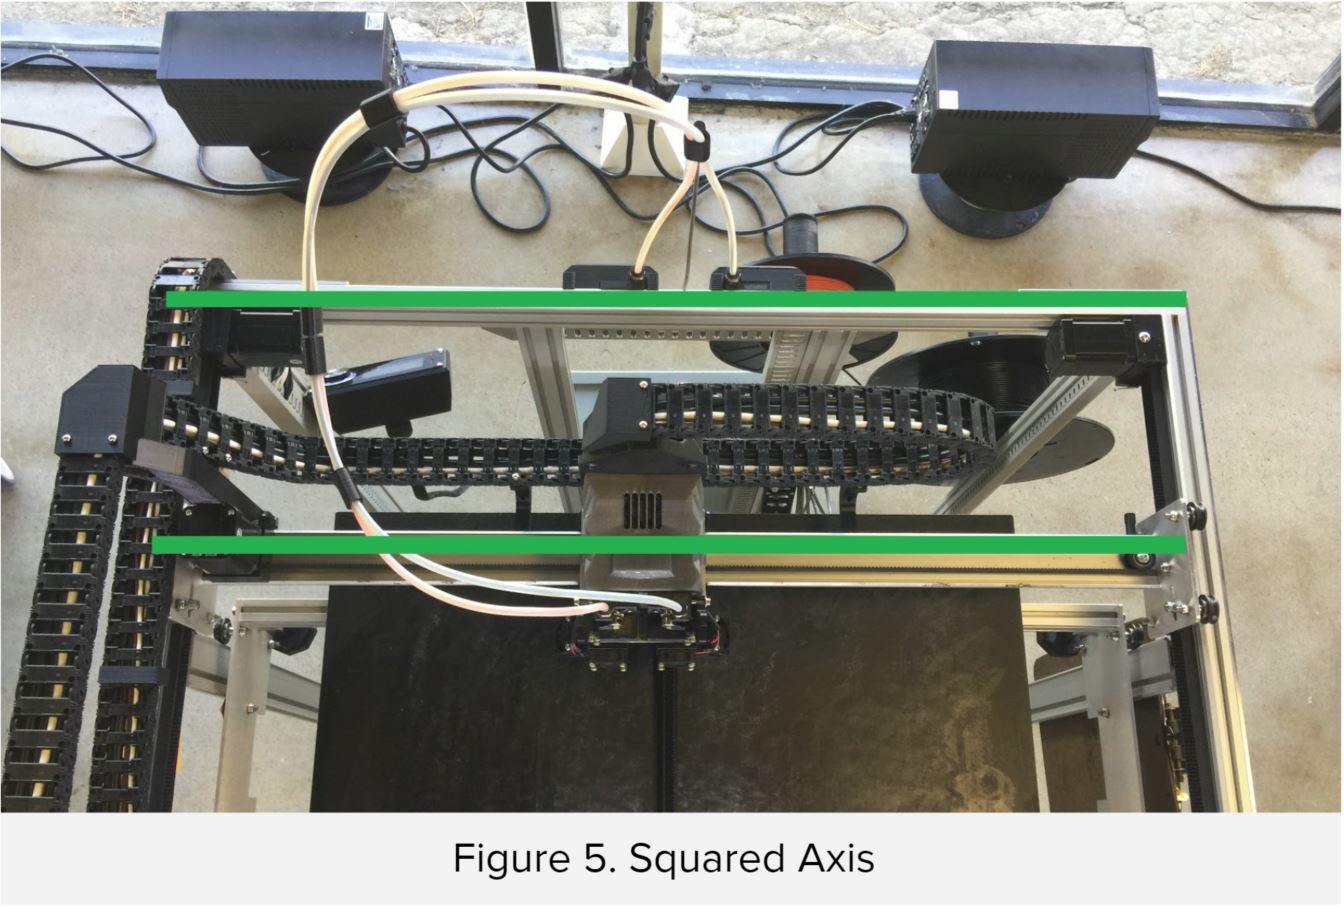
With dual Y axis homing switches, the machine is guaranteed to be squared to the frame every time the machine is homed (Figure 5). This will provide more consistent performance and accuracy for all prints. Paired with the new filament change routine, the Gigabot will show precise repeatability.
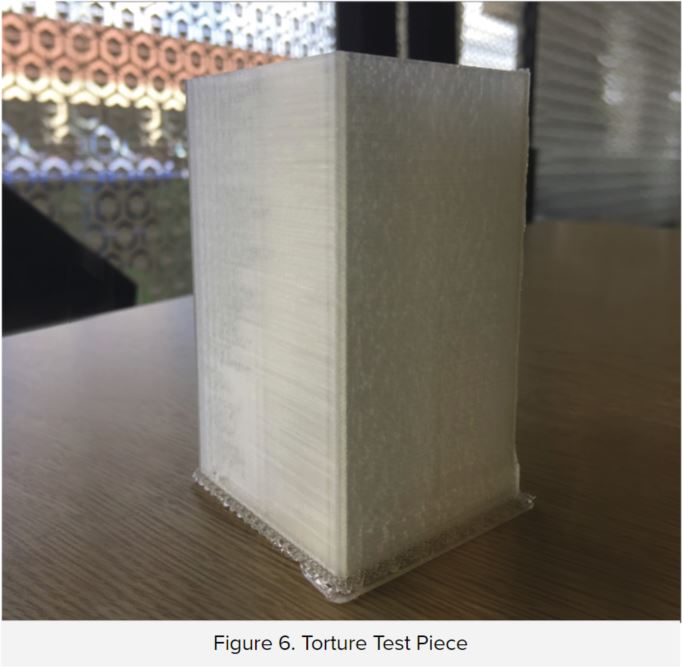
Shown in Figure 6 is a print completed to torture test the dual homing switch feature. A line of gcode was inserted after each layer incrementation to move the extruder aside, disengage the stepper motors, rehome, and continue printing. The results show the consist carriage squaring that the dual homing switch provides. After over 1000 layers, the tower shows homogenous layer quality with no layer shifts.
Linear Advance
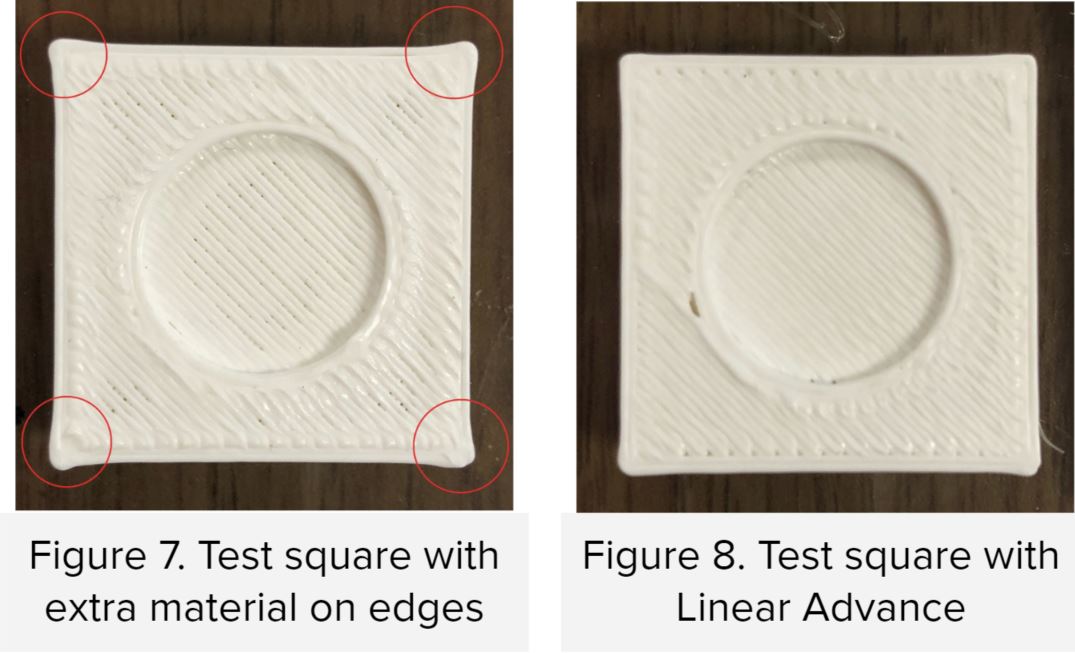
Do your prints ever look like the image in Figure 7? Linear Advance is a new feature that allows users to print more dimensionally accurate parts. Under normal conditions, the extruder gear moves linearly in proportion to all other axes. However, the pressure buildup in the nozzle is not proportional to other axes and this leads to extra material being extruded at the end of each movement.
To solve this issue, Linear Advance changes the extrusion rate whenever the extruder slows down or speeds up, creating an even extrusion line regardless of the speed or change in direction.
The advantages of this feature are listed on the Marlin website and are as follows:
Better dimensional precision due to reduced bleeding edges
Higher printing speeds are possible without any loss of print quality
Visible and tangible print quality is increased even at lower printing speeds
No need for high acceleration and jerk values to get sharp edges
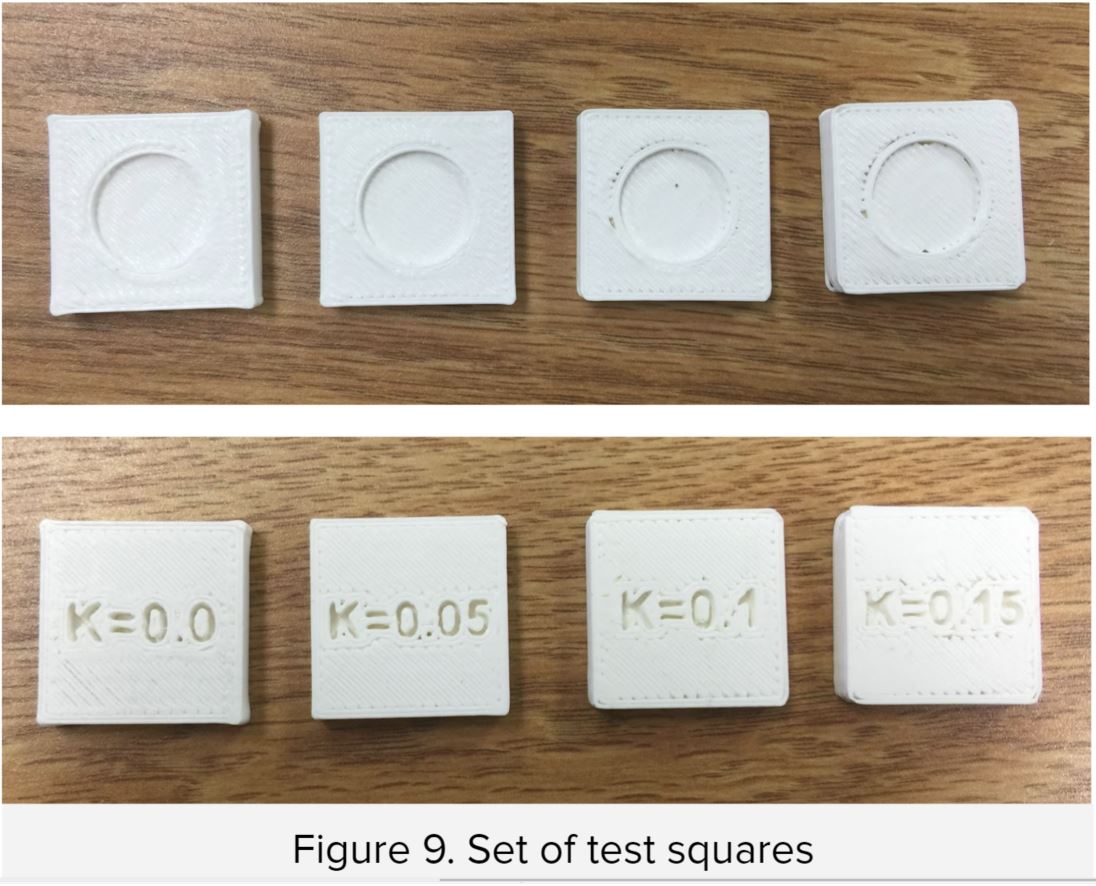
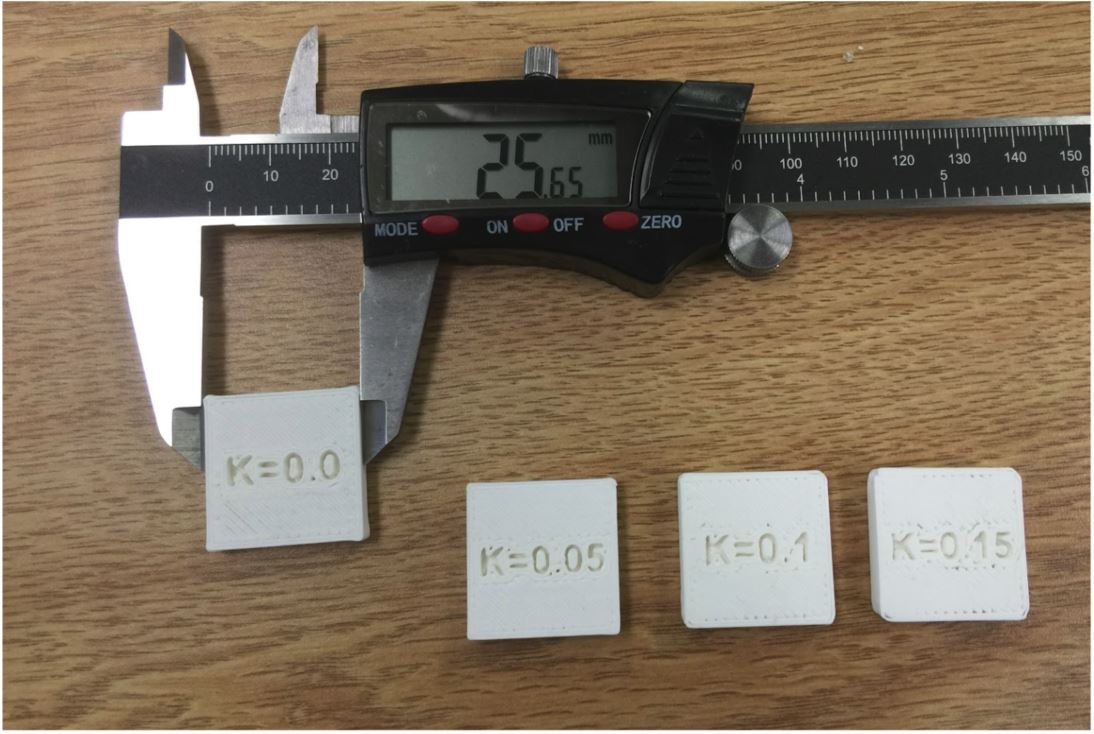
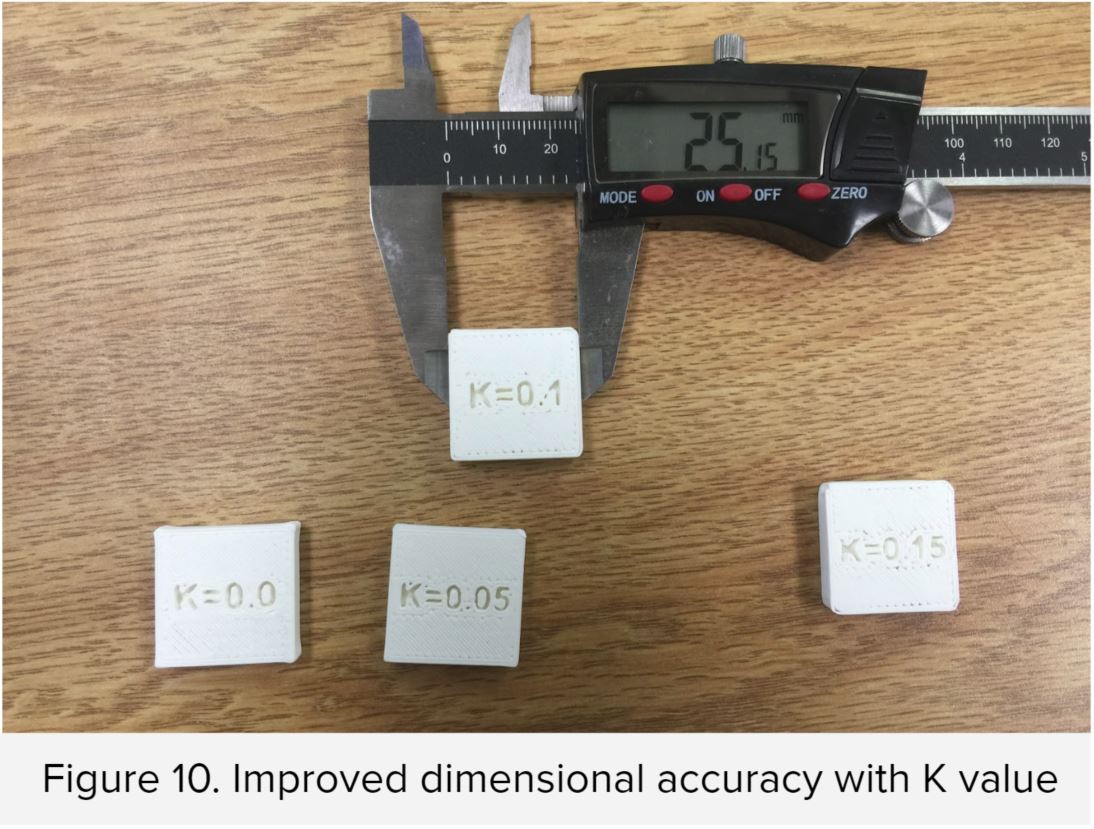
re:3D performed an extensive test on this new feature to determine the optimal K value for different layer heights and printing speeds. Shown in Figure 8, is a set of test specimens printed with different K values. Figure 9. shows the improved dimensional accuracy from a specific K value.
A weighted average value of K= 0.08 was chosen, improving print quality for a number of different print settings.
Check the blog post for more information:
Ditto Printing
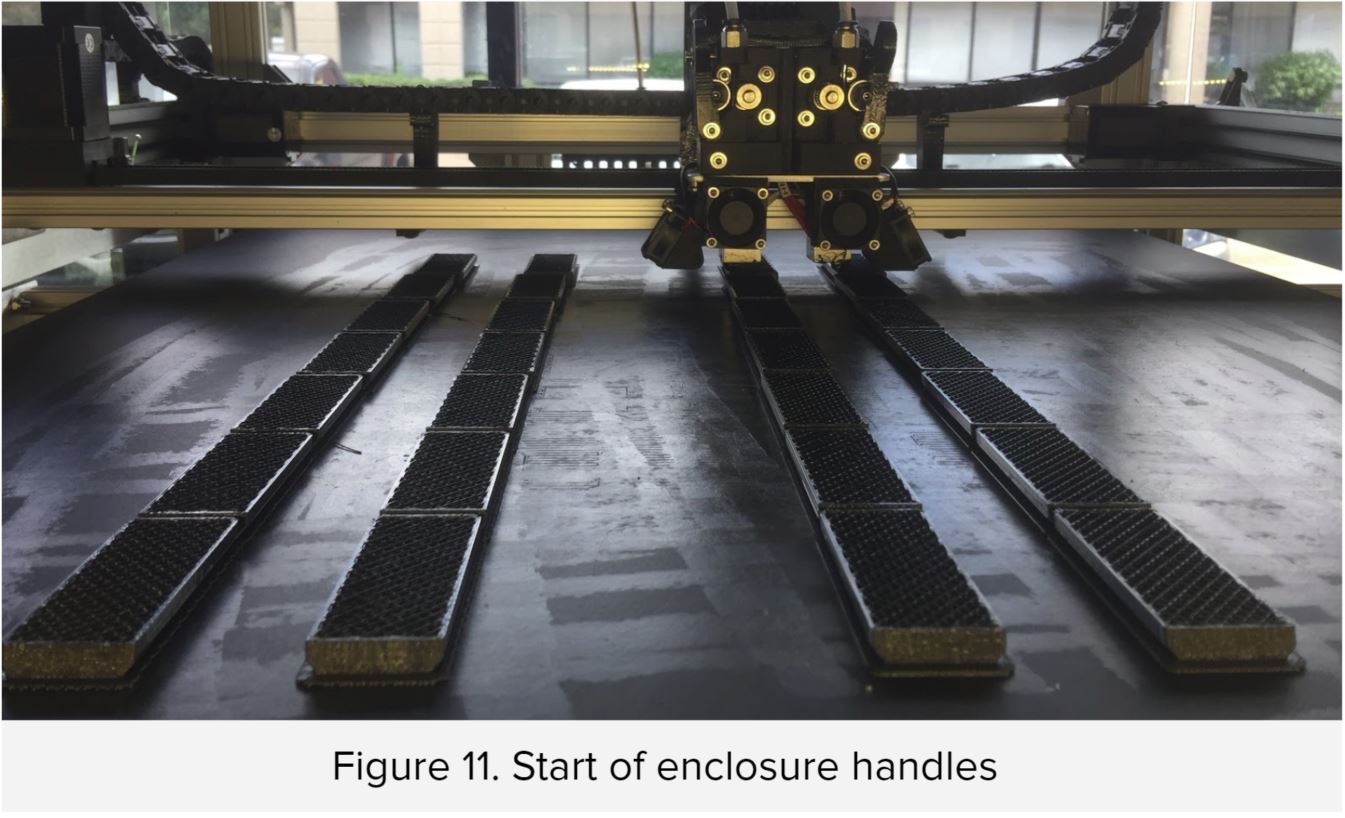
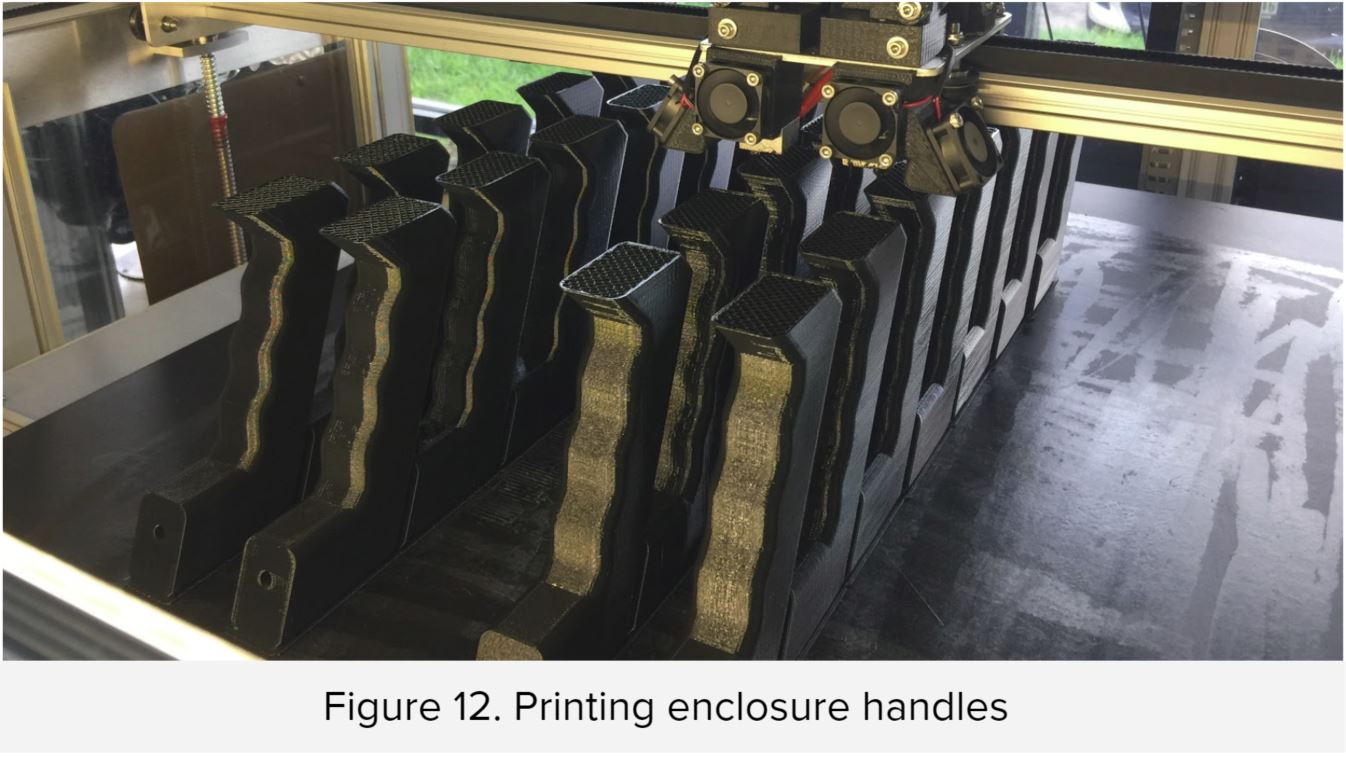
Duplicate nozzle printing (aka. Ditto Printing) allows the user to print with both nozzles at the same time. It can produce two identical parts with the only constraint that the X length of the object is smaller than the hotend offset (~55mm on the Gigabot). This feature is particularly useful when mass producing parts, cutting printing time in half which can be very beneficial. To enable this feature, download the new 4.3 Simplify Profile for Gigabot, choose PLA Duplicate Nozzle or PC-Max Duplicate Nozzle under the Auto-configure for Material tab and Duplicate Extruders under the Auto-Configure Extruders tab. In the slicer, place only one model on the build platform and start the print. The bot will produce two identical parts.
(Note that this feature works by mirroring the left extruder to the right. Only the left filament runout sensor will be active and the right will be inactive.)
re:3D uses this feature to increase the speed of printing in-house production parts (Figure 11,12).
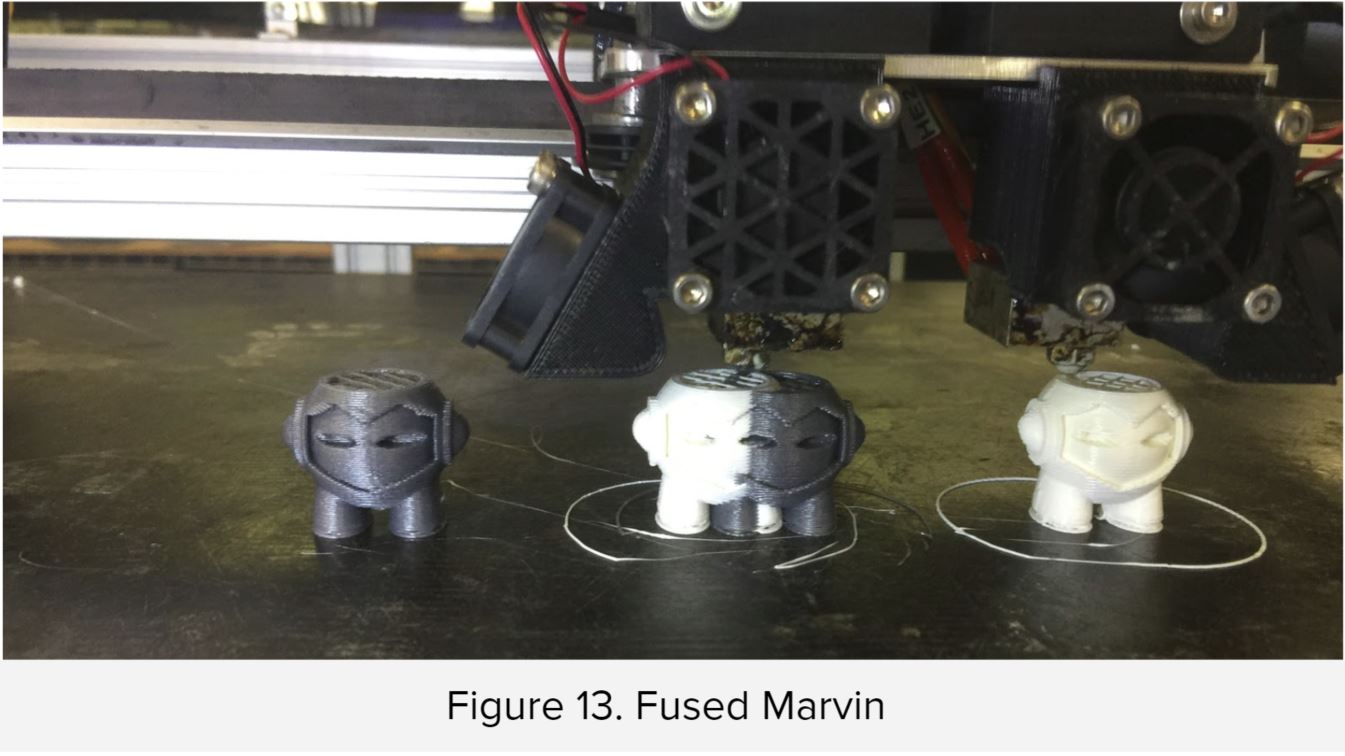
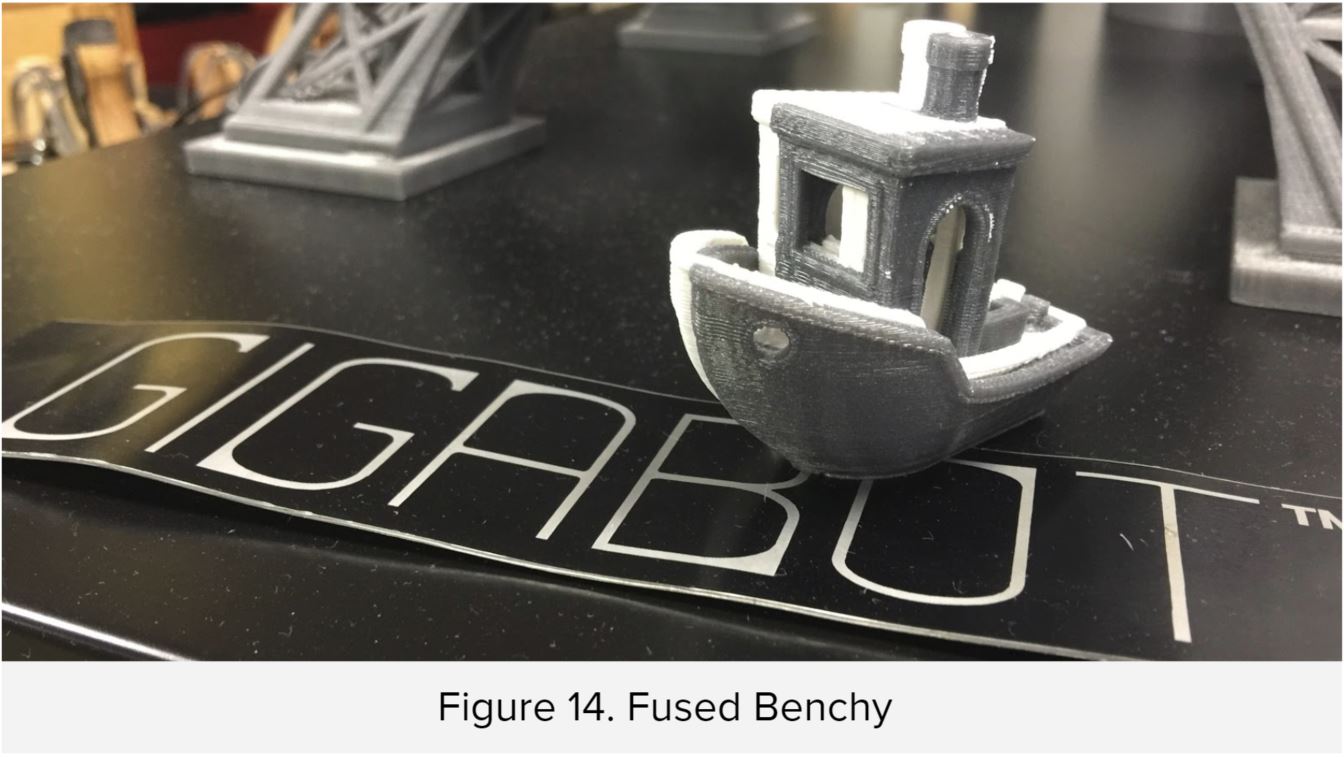
This feature can also be used to infuse parts together! Like this crazy dual color infused Marvin or 3DBenchy boat shown in Figure 13 & 14.
Filament Change Routine
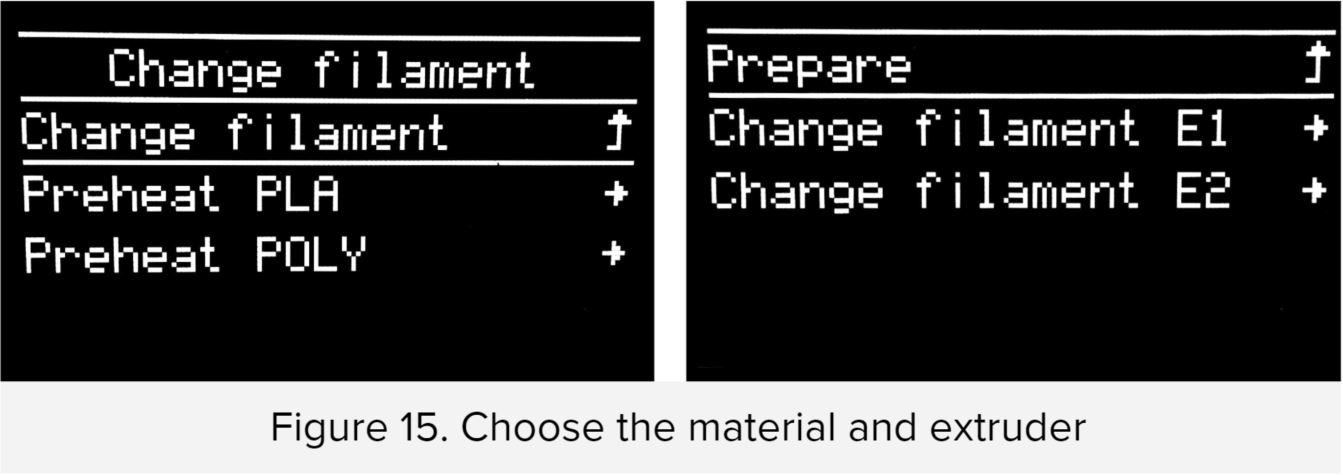
The new filament change routine provides a series of walk-through interfaces that guides the user through the entire process. The user first selects the extruder and material type that needs to be changed. (Figure 15)
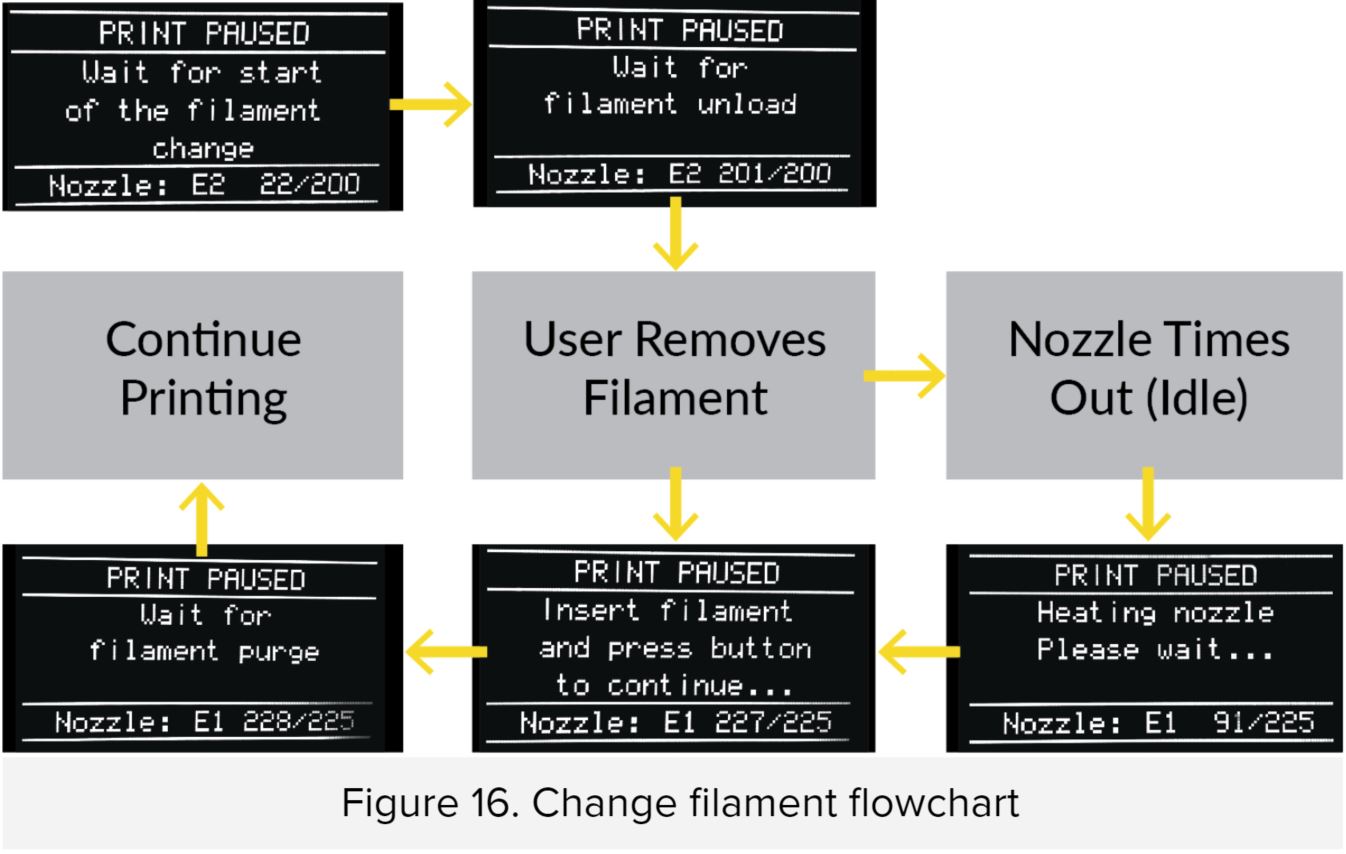
Shown in Figure 16 are a series of walkthrough LCD screens. The Gigabot will first heat the desired nozzle, then automatically unload the filament. The LCD will then direct the user to unload the filament and insert new filament. The filament will automatically purge and ask the user if they want to purge more or continue printing. There are also added safety features that will unheat the nozzle if the machine has been idle for a minute.
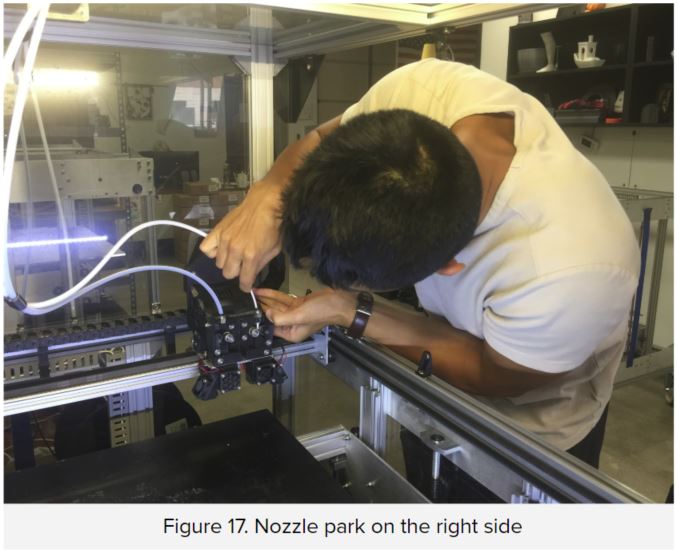
Previously, filament changes were tedious with the cable chain obstructing the workspace. With the new firmware, the nozzle park position is on the right side, avoiding all obstructions and allowing for easier filament changes. (Figure 17.)
Please Note: For filament changes from high-temperature material to lower temperature materials (Ex. Polycarbonate to PLA), Please manually heat the nozzle up to the melting temperature of the higher temperature material, switch materials, then purge 200mm of filament and lower the temperature down for the second material. This will clear out the nozzle of any previous material to prevent jamming.
Continuous Printing After Filament Change
Continuous printing after filament change is a feature specifically designed for the long prints that the Gigabot produces. Often times, the Gigabot uses an entire spool of filament and upon filament runout, the machine pauses and waits for the user to change filament. Production time will dramatically increase if the user is unavailable.
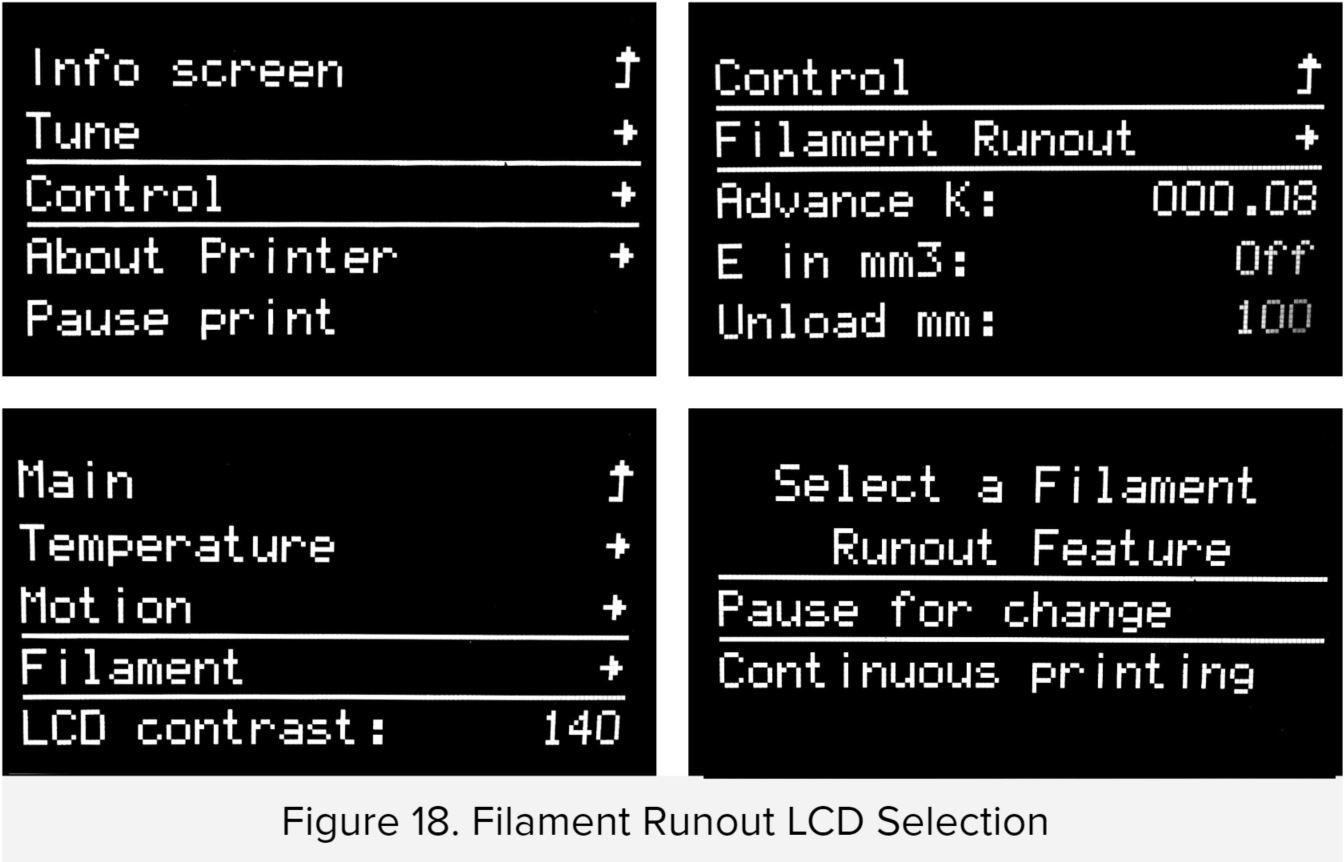
With the new Continuous Printing feature, the user loads two spools of the same filament into both extruders. When the first spool runs out, the Gigabot will automatically unload the filament, load and prime the second nozzle, and continue printing. This feature is listed under Controls> Filament> Filament Runout (Figure 18). The user can choose between two filament runout features, pause for change or continuous printing. These options are also available during mid-print so the user can change settings as any given time.
For very long prints, once the second filament spool starts printing with the left nozzle, it is suggested to pause the print and load another spool of filament into the right nozzle.
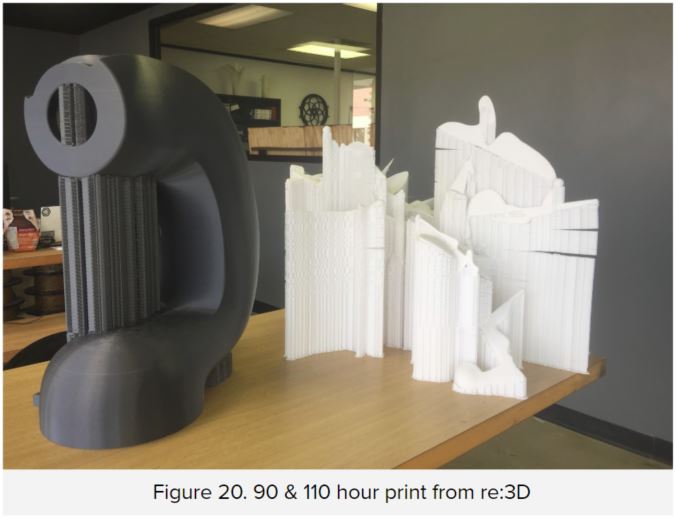
Shown in Figure 19 & 20 are some of the largest prints that re3D has done. The print time could have been dramatically shortened with the use of continuous printing after filament runout.
Babystepping for Perfect 1st Layer
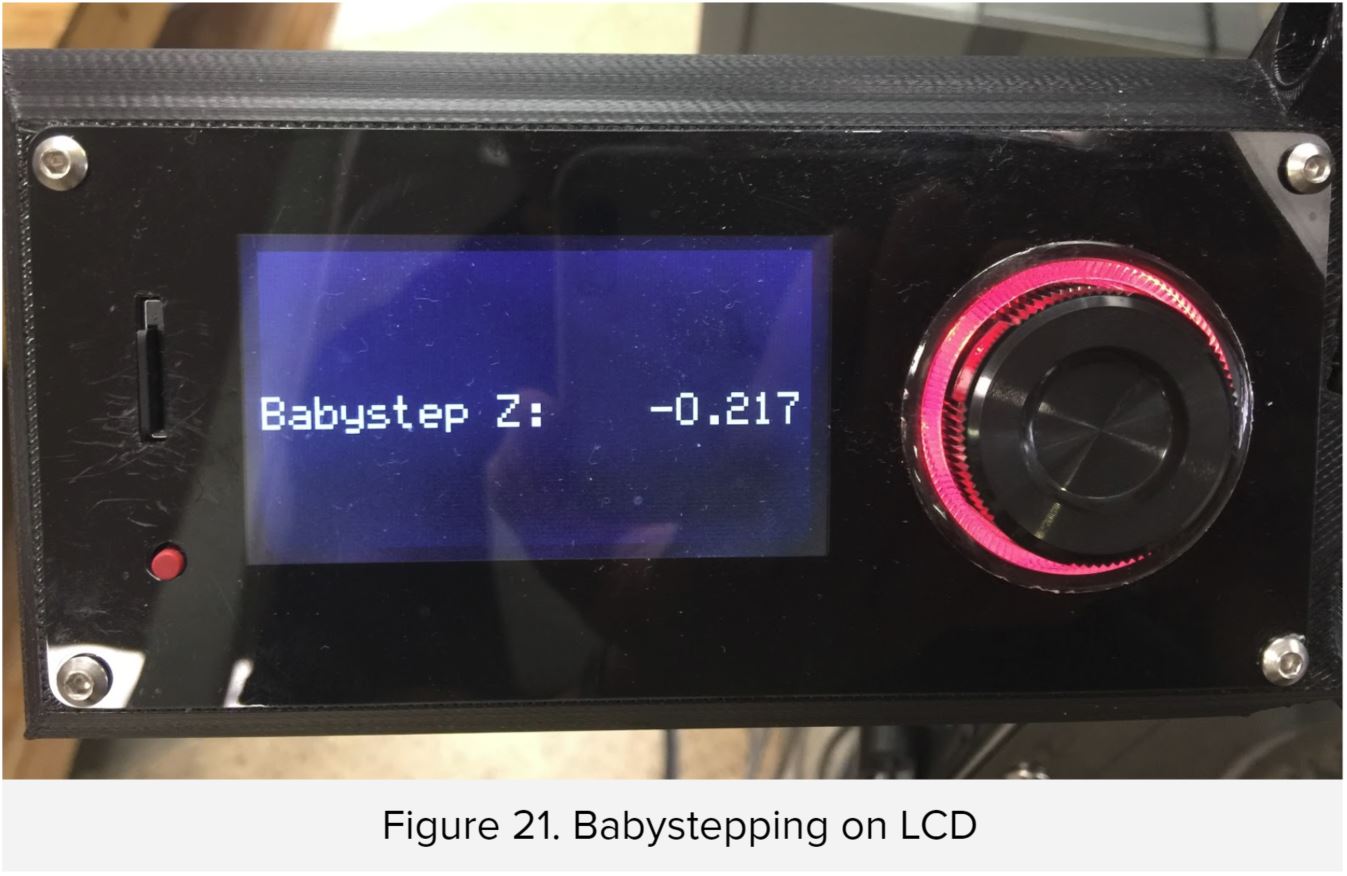
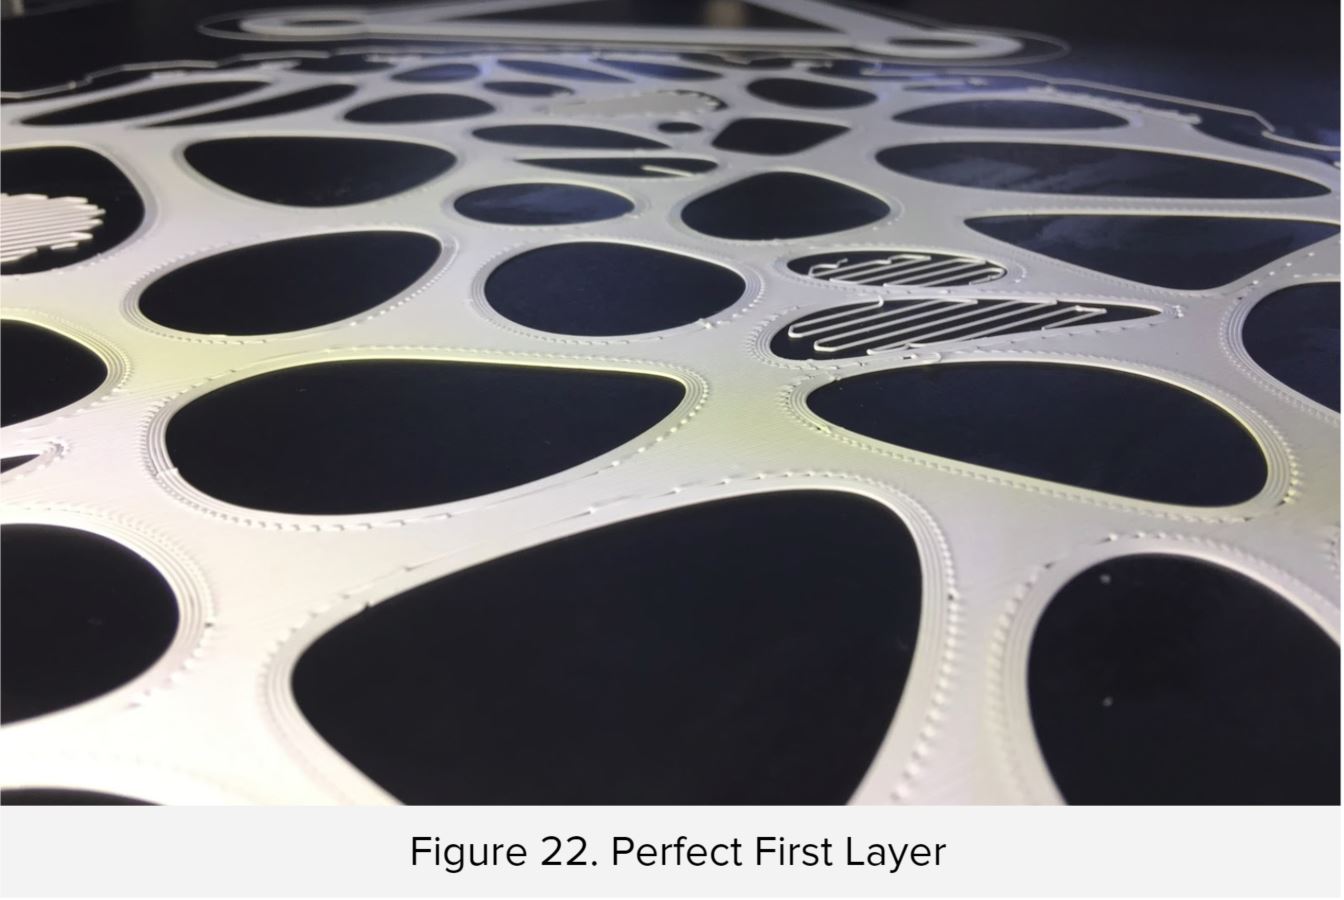
Babystepping allows the user to adjust the Z height at very small increments to achieve a higher quality first layer. To use this feature, double click the encoder during the first layer of your print until the LCD screen displays the Babystepping screen as shown in Figure 21. Scroll the knob to move the Z up or down (clockwise to move the nozzle away and counterclockwise to move the nozzle closer). Babystepping can also be activated through a M290 gcode. Look at that perfect first layer in Figure 22!
re:3D uses this feature to accommodate for the expansion of the heated bed during high temperature prints such as polycarbonate. A M290 Z0.25 moves the nozzle 0.25mm away from the bed and M290 Z-0.25 moves the nozzle 0.25mm towards the bed.
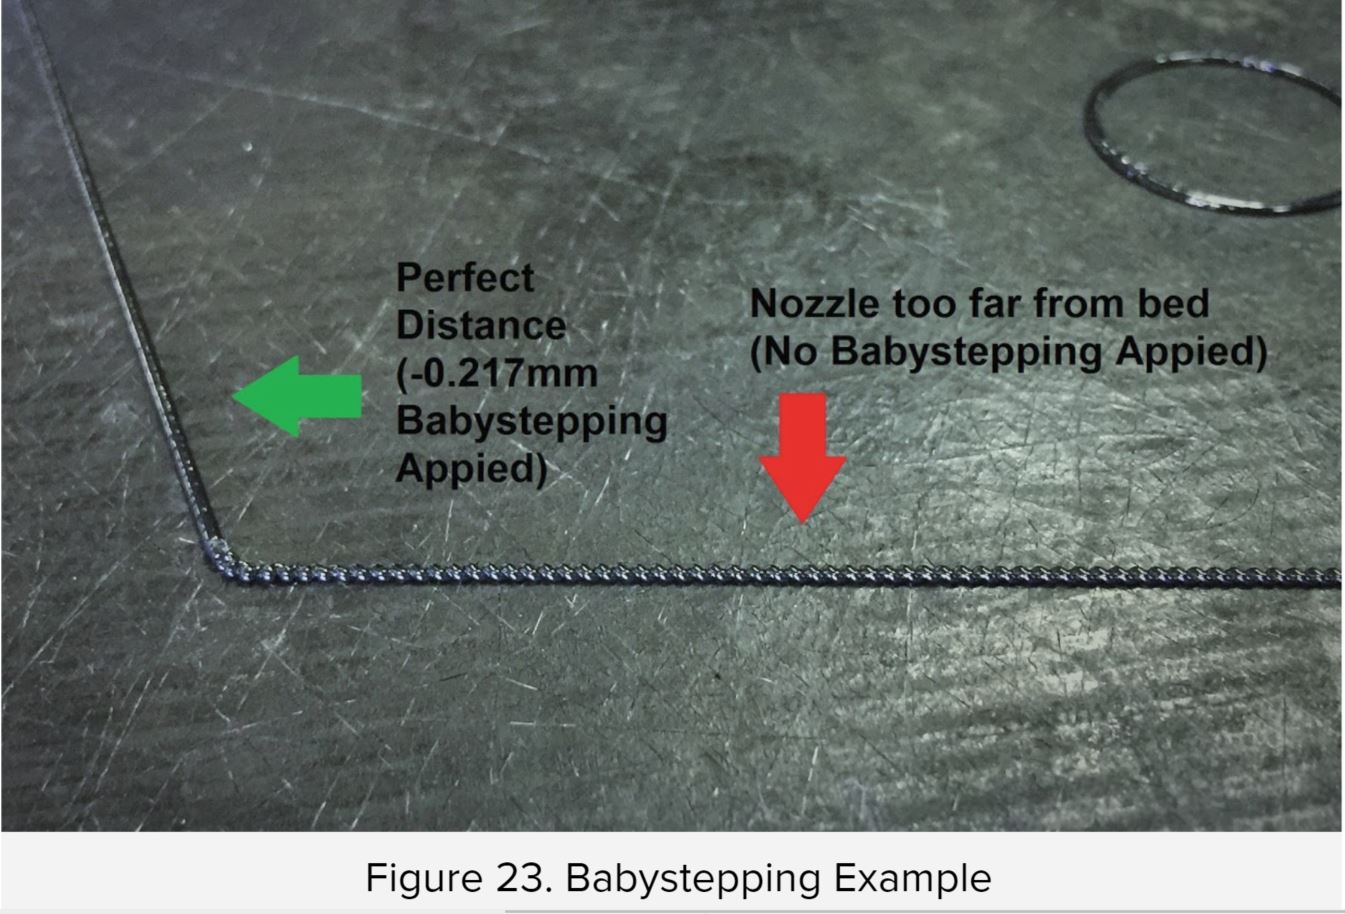
As seen in Figure 23, Babystepping can dramatically improve the first layer quality. At the start of this print, the nozzle was too far from the bed and the babystepping was adjusted to -0.217mm. After the adjustment, a perfect layer line was achieved.
Other Links
Please contact support if you have issue with the new Gigabot Firmware. For general questions, please post them in the forum. To view instructions, please go to the re3D wiki. For source code, please visit our Github page.
Notice: Please download the latest Simplify3D profile on our wiki to fully take advantage of all these great new features!
Machine Power Cycles when the user homes the machine and initialized change filament routine simultaneously
If using Ditto Printing, only the left filament sensor will trigger. The right sensor will be inactive. If the left filament sensor is triggered, the machine will eject filament from both extruders and only with the left extruder when printing resumes.