
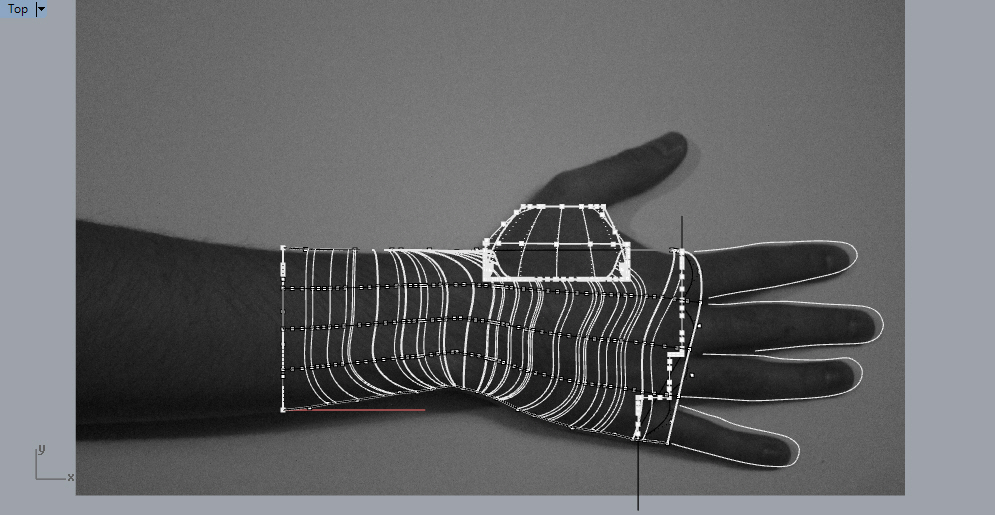
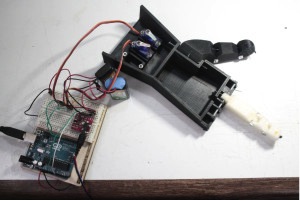
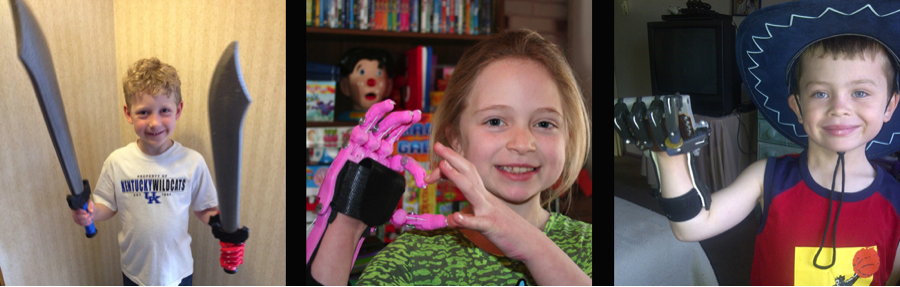
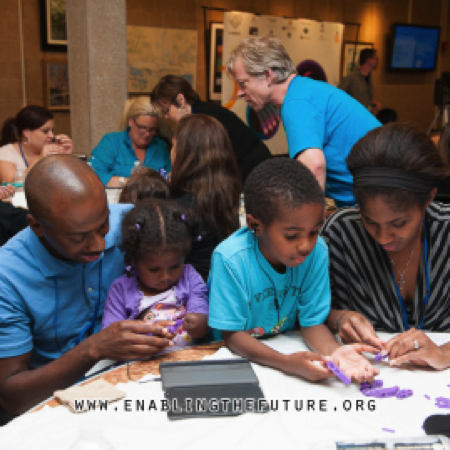
Two new customers have been unpacking and assembling their Gigabots this fall. They are miles apart from each other, yet they share the same dream of using creative new technologies to improve peoples’ lives. They are both using Gigabots in conjunction with other technologies to print open-source prosthetic hands.
Both were also contestants in last summer’s Great Big Gigabot Giveaway
From Bogota, Colombia Francisco “Pacho” Posada, has started a company called Manatí Lab. He is developing a robotic hand prototype called 3DMulp, which uses myoelectric technology.
Coinciding with Pacho’s delivery, Jon Schull of the Rochester Institute of Technology (RIT) also received a gigabot kit. Jon is the leader of E-NABLING THE FUTURE, a network of passionate volunteers using 3D printing to give the World a “Helping Hand”.
In future posts, I shall be following their stories. Stay tuned for more!
Sunny
Blog Post Author

At re:3D we are constantly evaluating opportunities to integrate open platforms and philosophies into our company & products. From the firmware that interprets Gigabot’s G-code, to 3D Thursday Google hangouts with our Kickstarter backers, we recognize that the best way to operate is by partnering with our community. With that in mind, we are experimenting with an iteration of our Gigabot open source design with an eye toward the Maker, the Tinkerer, and the Educator. We want to enable home or school-based manufacturing in a way that reflects today’s trends of openness, iteration, and personalization while solving some challenges you have shared.
Throughout this process, we’re learning a lot. Not only about 3D printing, but about how people create things, and what their challenges are. So in the coming weeks we would like to share this experience of gathering user experiences, and solicit as much feedback as we can from the tinkerers who have ideas and thoughts to share. We are also researching different ways to approach manufacturing, so you may see some alternatives to our current, low-volume approach that you see today in Gigabot.
Our aim is to align this version of Gigabot with the philosophies of the new industrial revolution that we see ourselves within. Customizable – yet having standardized interfaces. Modifiable – yet with a clean design. We want “Your Gigabot” to continue to be a melting pot for multiple industries, but have some specialized features that really take advantage of the size, and the diversity of input material.
The “experimental version” of Gigabot which we are currently calling “OpenGB” is designed to be built with open source development boards like the Arduino, and Beagle Bone. It will also explore solutions to some challenges our home based users and those collaborating on 3D printing projects have shared. We think there might be a better name than OpenGB, but haven’t found it yet. We’re are hoping you will have some ideas.
This Gigabot has been inspired by the feedback & needs of our hobbyist hackers. As we adventure into an even more open Gigabot, we feel it is important to share our plans, and collect your inputs along the way. We invite you to check out our blog for project updates and to contact us directly with feedback at engineering@re3d.org!
Patrick Finucane
Blog Post Author

Recently, our Resident Blogger Sunny took the time to interview a few folk at re:3D. Below is what they had to say.

Three words to describe yourself.
optimistic, goal-oriented, resourceful
What is your favorite 3D printing project that you’ve done or seen done in the past?
NY fashion week runway prints
What would you print with super large-format Gigabot+10,000? (10m cubed–it’s bigger than a football field)
A hospital & medical equipment
What is your filament of choice?
Ninja Flex
It’s the Great Big Gigabot Giveaway Time Machine Edition–if you could give the 1000th Gigabot to anyone in any epoch, who would you give it to and why?
I would give a Gigabot to build bio domes on Mars!

Three words to describe yourself.
Work In Progress
What is your favorite 3D printing project that you’ve done or seen done in the past?
Printing a urinal for a slum in Chile in 2013
What would you print with super large-format Gigabot+10,000? (10m cubed–it’s bigger than a football field)
Temporary housing for refugees
What is your filament of choice?
Plastic trash and food waste (especially pineapple!)
It’s the Great Big Gigabot Giveaway Time Machine Edition–if you could give the 1000th Gigabot to anyone in any epoch, who would you give it to and why?
Henry Ford- would love to get his feedback and see how it might have further influenced manufacturing in Detroit

Three words to describe yourself.
Working Working Working
What is your favorite 3D printing project that you’ve done or seen done in the past?
Printing check sockets for lower limb amputee
What would you print with super large-format Gigabot+10,000? (10m cubed–it’s bigger than a football field)
Rainwater collection barrels
What is your filament of choice?
High strength and blended materials
It’s the Great Big Gigabot Giveaway Time Machine Edition–if you could give the 1000th Gigabot to anyone in any epoch, who would you give it to and why?
Mother Teresa

Three words to describe yourself.
Passionate. Fun. Pineapple.
What is your favorite 3D printing project that you’ve done or seen done in the past?
My favorite 3D printing project was printing a large rendition of the front face of the Notre Dame de Reims Cathedral in Reims, France for Disney Imagineering. My second favorite was a fully working printed-as-one-piece foot-wide planetary gearset. I then broke the gearset by demonstrating its durability by dropping it on concrete 20+ times from head height at Engadget Live. Luckily, I just printed another one.
What would you print with super large-format Gigabot+10,000?
Given that size, I’d say printing a football field would be a nice start. After that, I’d probably print a spaceship.
What is your filament of choice? (3mm PLA, string cheese…does not have to be realistic)
Unicorns.
It’s the Great Big Gigabot Giveaway Time Machine Edition–if you could give the 1000th Gigabot to anyone in any epoch, who would you give it to and why?
Sam Snabes. She started the company and still doesn’t have one yet. After Sam, probably Norman Borlaug in 1937. He saved about a billion people by creating dwarf wheat. I think he’d probably be able to save a lot more with a 3D printer. Oh yeah, and once he found Texas in 1984, he never left.

Three words to describe yourself.
Curious, insightful, zany.
What is your favorite 3D printing project that you’ve done or seen done in the past?
Our first project on Gigabot – a series of 3D printed vases. They demonstrated the limitations and advantages of printing at a large scale and it was exciting to see something bigger than a breadbox made before our eyes. That was an exciting time for us and gave us the opportunity to explore, plant nuggets of inspiration, and easily distribute design.
What would you print with super large-format Gigabot+10,000? (10m cubed–it’s bigger than a football field)
Without fail, a new space shuttle for Virgin Airlines, SpaceX, and NASA. Exploration is what keeps us going forward — and we can’t let failure hold us back.
What is your filament of choice?
Copper Alloys are some of the most precious and interesting materials on our planet. They exhibit a high resistance to corrosion, are highly conductive, make delightful music, are natural anti-septics, and have a shine like no-other. That is an ideal material I would be honored to design with on Gigabot someday.
It’s the Great Big Gigabot Giveaway Time Machine Edition–if you could give the 1000th Gigabot to anyone in any epoch, who would you give it to and why?
Well, if we’re speaking hypothetically and involving time machines, Walt Disney himself. The man was a true visionary and has helped us believe bigger for generations. At the heart of it, we’re all still kids and we all still want to experience magic. 3D printing has that potential for entire communities.
Three words to describe yourself.
Mr. Squeaker’s best friend
What is your favorite 3D printing project that you’ve done or seen done in the past?
Printing a new printer on an old printer
What would you print with super large-format Gigabot+10,000? (10m cubed–it’s bigger than a football field)
A 35ft statue of Mr Squeakers to put in my front yard
What is your filament of choice?
PLA- my wife has a nose for ABS and outlawed it…
It’s the Great Big Gigabot Giveaway Time Machine Edition–if you could give the 1000th Gigabot to anyone in any epoch, who would you give it to and why?
Someone in need

Three words to describe yourself.
excited, resourceful, creative
What is your favorite 3D printing project that you’ve done or seen done in the past?
Extremely inspired by the 3d printed backyard castle from Andrey Rudenko. His next step is to design and print a contemporary home. Hope to one day be a part of 3d printed housing myself.
What would you print with super large-format Gigabot+10,000? (10m cubed–it’s bigger than a football field)
Replace the slums of india with safe and modular 3d printed housing!
What is your filament of choice?
Bamboo!
It’s the Great Big Gigabot Giveaway Time Machine Edition–if you could give the 1000th Gigabot to anyone in any epoch, who would you give it to and why?
Leonardo Davinci – Can’t imagine what he could have designed with the ability to rapidly iterate.
Katy Jeremko
Blog Post Author

Rewind to late 2013.
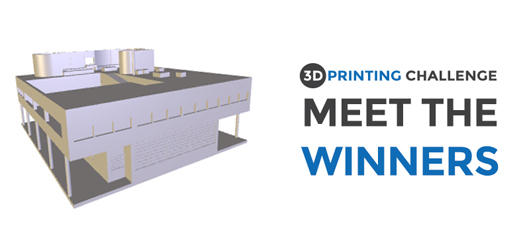
re:3D was in the middle of Kickstarter fulfillment, focusing on our backers, and building the core mechanics of our company, all the while introducing ourselves to the 3D printing community. The architecture community was one of our emerging markets for large format, affordable 3D printers, and through a fortunate introduction via Start-Up Chile during DemoDay, we had the honor of partnering with Arch Daily. Through the guidance of our rockstar designer, Lorena Quintana, the ArchDaily 3D Printing Challenge was born, and we yelled far and wide: “Calling all designers and architects – model your favorite masterpiece from modern architecture, and we will 3D print it on our Gigabot!”
The response was pretty impressive. ArchDaily has a very wide reach, and models from around the world came in to be judged by editors, Sketch-Fab, re:3D staff, and the global community via Internet voting. When all was said and done, 19 finalists with high quality .STL models of the most amazing buildings on the planet were waiting to be brought into the physical world.
There were two winners who very deservedly were awarded large versions of their models. Elijah Wood created a model of the Lotus Temple in New Delhi, India which included the striking landscape surrounding the building, and Luisa Lense created a model of Villa Savoye, a nearly century-old basis of modern architecture near Paris, France.
I could easily and quite accurately end this blog post here, with “and we printed these great models for Eli and Luisa on the Gigabot”… but there is so much more of a story than that.
At the time of the challenge, re:3D was fulfilling a promise to Kickstarter backers that included a large 60cm x 60cm platform on their Gigabot, but not a heated bed. In fact, so much emphasis was on the Gigabot itself that the heated bed was a relatively low priority. Up until this point, we were printing enlarged models from the open source community: Large vases, skyscrapers, hand tools, and a thousand smaller items. We honestly did not print much that would push the limits of the highly forgiving PLA filament.
Enter into the mix a 2-foot square landscape surrounding the Lotus temple, containing 50,000 triangular faces and covering the entire bed. The results were challenging and stressful, to say the least! One night a co-founder (who shall remain nameless, but here’s a hint) slept next to an ongoing Lotus print in the Houston office so that she could stop it if it curled. It did, and she woke up immediately to the sound of crunching plastic. The direct result: heated bed development was accelerated, a feature that every backer and pre-order customer was asking for from day one. The heated bed today works like a charm – so powerful it can even make you breakfast!
Throughout the process of attempting to print the Lotus building and interfacing with the model’s designer, a wonderful thing happened — Eli Wood wanted to come to work with re:3D!!

So our Design Lead put together a plan for a summer design internship, and Eli joined a team of champions who brought our idea-to-model workflow to the next level. Everything from printing human-scale objects for a Gigabot photo booth, to a Saturn V rocket that stands taller than most visitors to the Houston office, to the beginnings of experimenting with some prosthetic models for amputees – this design team catalyzed some long-awaited variety in the myriad of applications of our Gigabot.
This brings us to the second of our ArchDaily winning models. The Villa Savoye is a beautiful building. Its second floor seems to float above 15 relatively thin pillars which surround its smaller first floor. I remember when I first saw the model and was amazed, and then my heart sunk. It had straight, blatant overhangs of 90 degrees across three of the four sides, small pillars, and of course, the need to print over a large portion of the bed, something that we were already having trouble with on the Lotus temple. Using support material was out of the question, since the support would be just as large as the pillars themselves, and could not be saved when we removed the support. It was very quickly clear that this model needed to be split into pieces.
Splitting a design file for a designer is not hard, but the original file format is needed, and usually the original designer who is familiar with the software it was designed in. Luckily we got everything we needed from the wonderfully patient Luisa. With the models, and some huge help from another member of the Design Team this past summer, Robert Legans-Johnson, we were able to successfully print the Villa Savoye in parts and send them to Luisa.
We would also be remiss not to mention that in parallel to the other challenges with these large prints, for both the Lotus and Villa Savoye, we ended up realizing that our primary slicing software algorithms weren’t quite working out, given the extremely unique models we were dealing with. This was just the beginning of seeing our community contribute models – if this is how complicated they can become then we need to find a way to accomodate. This drove the company to look deeper into a partnership with the makers of Simplify3D. Their software is a full-featured slicer, gcode rendering engine, and printer controller that can handle the big demands of larger prints, in a very user-friendly way. We now offer Gigabot owners the option to use Simplify3D, and offer tailored customer support since it’s what we now use on most of our Gigabots in the office.
Partnerships and are so important for small businesses — particularly self-sustaining, global, and community-based ones. During the past year we watched this one partnership with ArchDaily facilitate both product development and another partnership, which enabled an entire team of self-motivated unpaid interns to do amazing things for the vision and direction of our small business, which is opening up doors never thought possible one year ago. In short, if there was ever proof that we are better because of our community, this is it. Stories like these are what brought re:3D to our $1M revenue mark, while we kept sight of the original social focus that brought our group of friends together in early 2013.
Our advice to any young startup wishing to grow within their community: find a partner who is willing to take a chance with you, and yell far and wide. Maybe its human nature for people to have more interest where they see active cooperation taking place. Or maybe it’s the shared reach of the two diverse groups that catalyzes the conversation. In this case it was almost certainly the faith that ArchDaily had in the very early stages of our socially-minded 3D printing startup, that brought us to new heights over the past 12 months.
To our friends at Arch Daily, Sketchfab, the Santiago Makerspace, Start-Up Chile, those that submitted to the 3D Printing Challenge, and the community that voted, we offer our sincerest thanks. Your support, patience, and ability to challenge us drives us forward every day!
Un Abrazo Fuerte,
The re:3D Team

It’s one thing to have your company’s or school’s logo on a T-shirt, but have you ever wanted to make a 3D model of your logo to use as a keychain, business card, or maybe a coffee table? In this blog I’ll show you the process I use, and how (kind of) simple it can be. No, really, I’ll keep things basic and in all cases rely on much smarter people and tools than I could muster up myself.
Of course if you have any other suggestions for a better method, corrections/clarification to this method, or are skilled in the “complicated” ways of doing this, please leave comments on the cross-post on our Facebook page or G+ Community.
So, let’s get started.
Say you have a really cool company and one of your co-founders is a ninja of design. Chances are you have a great 2D logo that is just screaming for access to that 3rd dimension. In this example, we’ll use Katy’s re:3D logo. Make sure you have your file saved locally as a .png, .jpg, .gif, or .bmp. These filenames are of the “raster” variety (think pixels on a TV). The clearer the image the better, because we’re about to convert these raster files to vector files (think connect-the-dots meets color-by-number).
There are a bunch of ways to do this in expensive (and probably inexpensive) image processing packages, but I found a pretty solid online converter that does enough to get us by without knowing anything about layers and paintbrushes. Go to http://image.online-convert.com/convert-to-svg and upload your image file where it says “Upload your image you want to convert to SVG:”. Select the “Monochrome” checkbox to help prevent it from getting too confused. Click on “Convert File”. Your .svg version should download to your default directory. Note where this is since you’ll need it in Step 5.
Go to https://tinkercad.com/ and sign up for a free account. I guarantee you’ll use it again. Once you have an account, and have either skipped or run through the actually pretty useful tutorials, start with a fresh palette using the “Create a Design” button from the dashboard.
You’ll be presented with a blank grid, and a random name will be assigned, like Ominous Seapod or something. Click on the “Design” menu, and then “Properties”. Change the name to “3D Logo” or something similar and more original. Choose the visibility and license you want, and then save changes.
On the right side of the screen you should see an “Import” section. If it’s not already expanded, click on the triangle to do so. Then click “Choose File” and point it to your .svg file created in step 2.

Here’s where you need to experiment a bit. Depending on how much resolution you kept in your original file, the model may completely overwhelm the design space. For now, choose values of 5mm for the height and 20% for the scale. This will make sure that you can at least tell if your model ended up on the canvas (and it doesn’t just cover the entire field of view with a single face. For rescaling, if you want to maintain the 5mm height, it’s much easier to just re-import at a different scale, rather than scale with the Tinkercad tools on an over/undersized model.
This is where the tutorials from Tinkercad are useful. Use the zooming and pan/rotate tools via your mouse or trackpad to analyze the model, making sure that all of the detail you need is there. If you see too much missing or some jagged lines, try to find a higher resolution image to start with, and go back to Step 2 and try again.
Adding bits: Tinkercad will also let you add a platform (or anything else) on your model. This can be useful if you have letters in the logo that float free when converted to 3D. Those free-floating insides of “O”s and “A”s will float right off the final product when you 3D print it out, so best to find some way to tack it down. The easiest way to do this is to create a “Geometric” shape from the right sidebar that is an approximate shape of the logo (rectangle, circle, etc.), and give it a dimension of 2mm high. Place it on the platform next to your logo, size it right, make sure it has the same bottom level, then move it right on top of your logo. When both pieces look like they fit, select both at the same time (by simply dragging a select box around the entire thing), and click on “Group” above.
Subtracting bits: If you needed to put a hole somewhere on the model for a keychain, cup holder, etc, all you need to do is follow the above process, but make it a hole instead of a “color”. Use the buttons at the top right to do this. When you “Group” your logo with a small cylinder that spans the height of the model, voilà! It’s a pendant!
This step couldn’t be easier with Tinkercad. Click on the “Design” menu, then “Download for 3D Printing”. Select “.STL”, and the file will start downloading immediately.
They’re popping up everywhere these days: your local library, makerspace, Earth-orbiting laboratory… wherever you are, you’re probably not too far away from a 3D printer with some spare time on its nozzle. If you can’t find one nearby, you can of course order a 3D printer of your very own (we recommend this one, especially if you go the coffee table route) or have someone else print it via a service such as Hubs or Shapeways.
The skills you’ll learn and feeling you’ll get by going end-to-end in making something that never existed before is like no other. Welcome to the world of mass customization, where you don’t have to make 10,000 of something in order for the act of designing it to pay off. Make some new models.. iterate, experiment, and most importantly, share it! If you make something awesome consider posting it on a model sharing platform such as SketchFab and sharing the link here in the Facebook or G+ comments.
Chris Gerty
Blog Post Author

Hi Friends,
As you may have noticed, the re:3D crew hasn’t stepped out of the office much this year.
While we miss the community, our little team elected to spend our limited resources in bettering Gigabot, meeting as many customers as our gas tanks would allow, and getting organized as a full-fledged small business. Now that we have parts in inventory and an amazing staff to help with order fulfillment, we are pleased to announce that we have a little more bandwidth to be with many of you this week at Web Summit 2014.
We’d love to chat if you plan to attend and/or meet up with any media or companies you think would be valuable.

You can find us at the following events:
Belfast Summit: You can catch us on the Summit bus heading there from Dublin on Nov 2nd & back on Nov 3rd or at any of the scheduled events.
BETA Exhibit: Last spring we applied for a discounted opportunity to attend Summit as a featured start-up. We are honored to be selected for the BETA showcase. As a BETA startup we will be exhibiting on Nov 4th in the Hardware area, which is located in RDS Main Hall. Our stand number is HRD102.
People’s Panel: Thanks to you we placed #5 out of hundreds who applied to Summit’s popular & entirely crowdsourced stage of speakers from around the world. For making the Top 10, we will be moderating a panel we proposed on Nov 4th.
Time: 16:19-16:34 at the Simminscourt Venue | Topic: Toilets & Trash-Will 3D Printers Save the World? | Panellists: Ion Cuervas-Mons, Asha Saxena, Tina Stroobandt
BETA Pitch: After 2 weeks judging over 1,500 applications, the Web Summit judges chose their top 200 companies to pitch during Web Summit. We’re delighted to share that re:3D qualified to join the PITCH BETA group! Watch us compete against the best companies beginning with Round 1 on Tuesday at 14:00 GST for almost $20K USD!
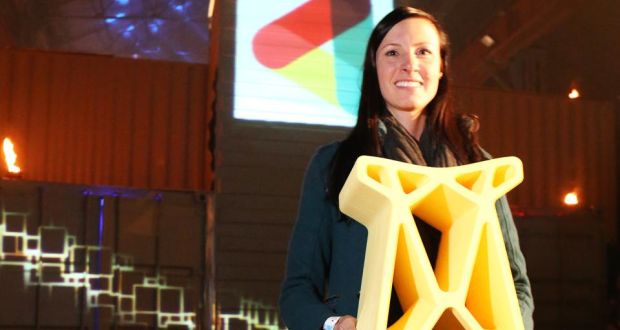
Finally, we were blown away when Samantha was selected as a Women in Tech Attendee!
Don’t have tickets, but planning to be in Dublin? We’ve also registered for the following side events:
Let us know if you or a friend would like to say hi! We’ll also be making a couple of BIG announcements and traveling with some pretty cool prints we’d love to show off!
See you soon?
CHECK BACK OFTEN – WE’LL BE DOING OUR BEST TO ADD EVENTS AND RSVP LINKS ALL WEEK!
re:3D’s Headquarters is Moving to Austin! Delivery will be delayed until June 2024 for orders placed after May 1, 2024. LEARN MORE